Test Kolibri in Linux guest
Download virtual machine images
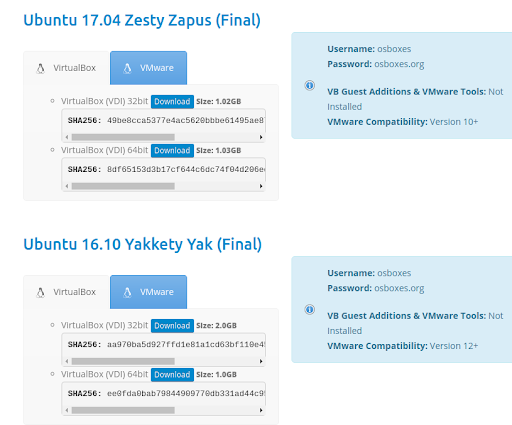
You can download the ISO image and install any Linux distro the usual way, but ready-to-use images to save time it is recommended to and. Choose the virtual machine (VM) image you wish to test according to your host OS and download them to your computer.
Select Ubuntu version
Select VirtualBox platform
Select
Import and configure Ubuntu VM image into VirtualBox
Extract the contents of downloaded .7z file to obtain the corresponding VM image file with .vdi extension.
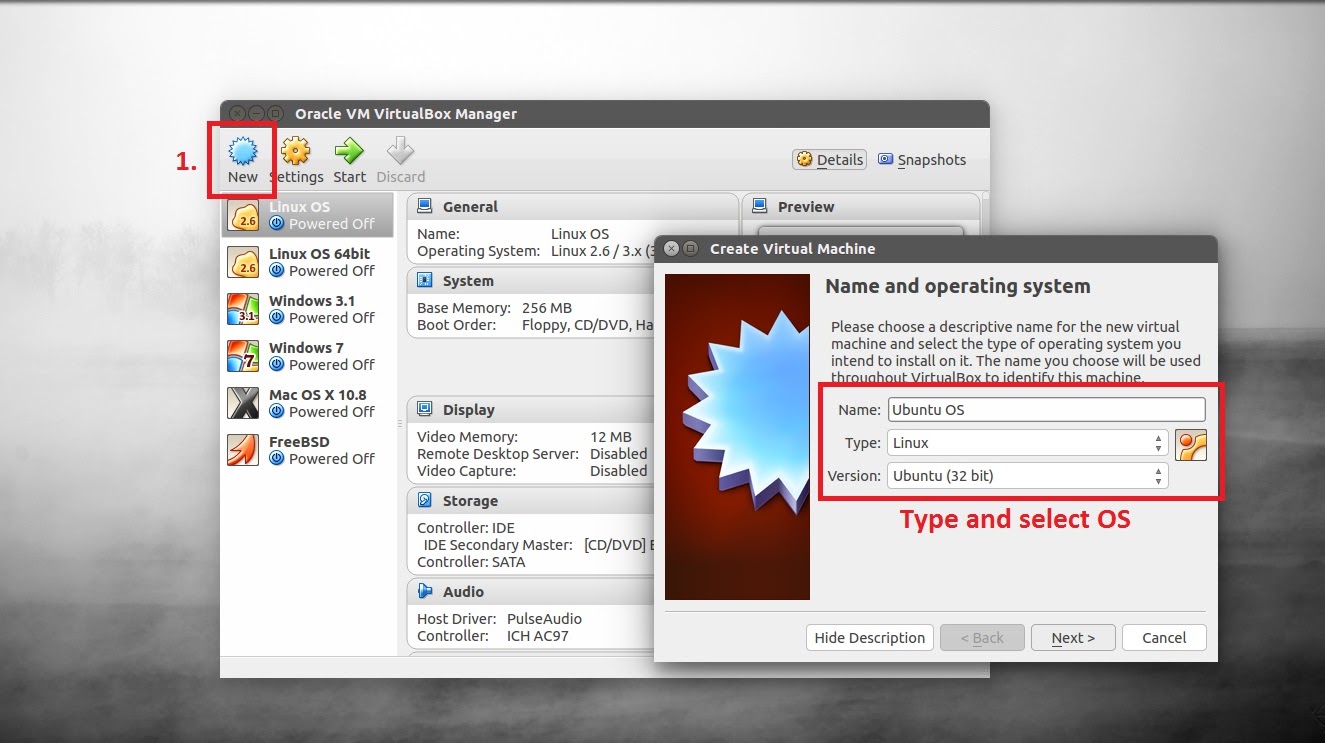
Open VirtualBox click on New button.
Type OS Name, select OS Type and click Next.
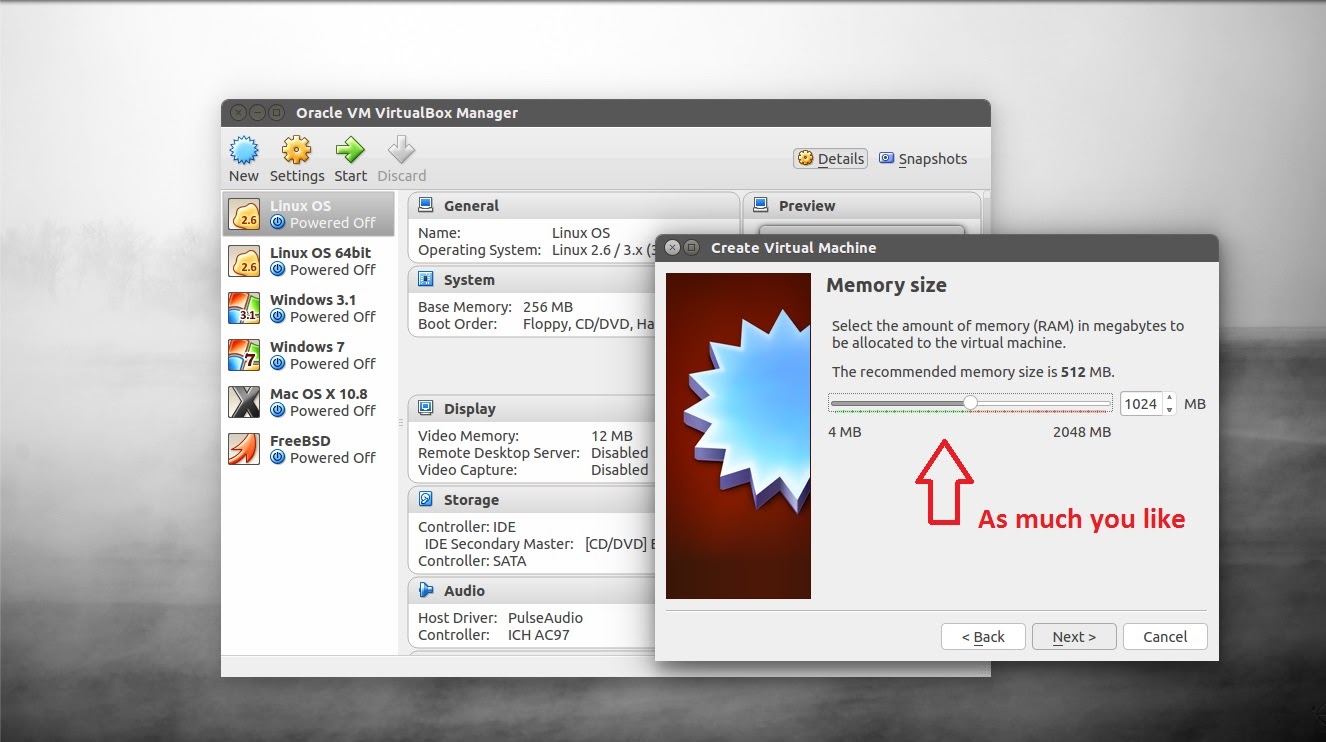
Set available RAM.
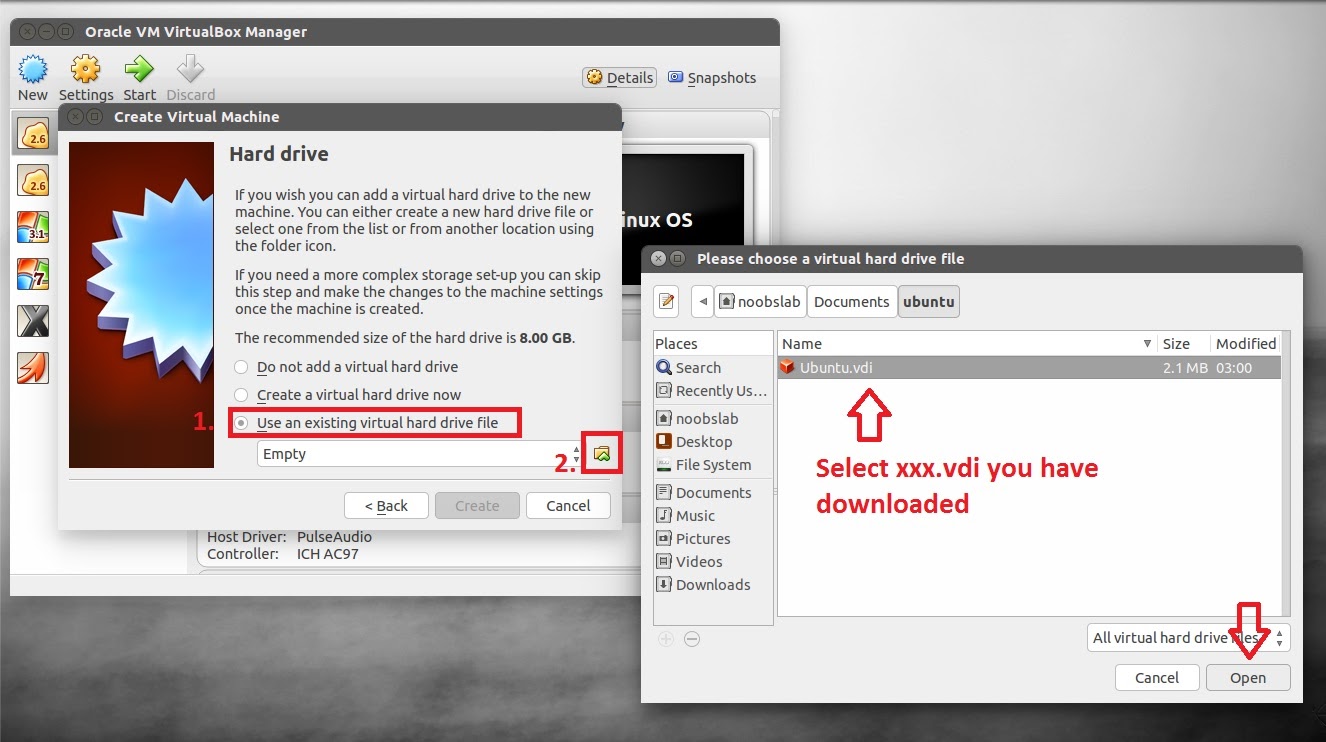
Select Use an existing virtual hard drive file, browse to where VDI image is located.
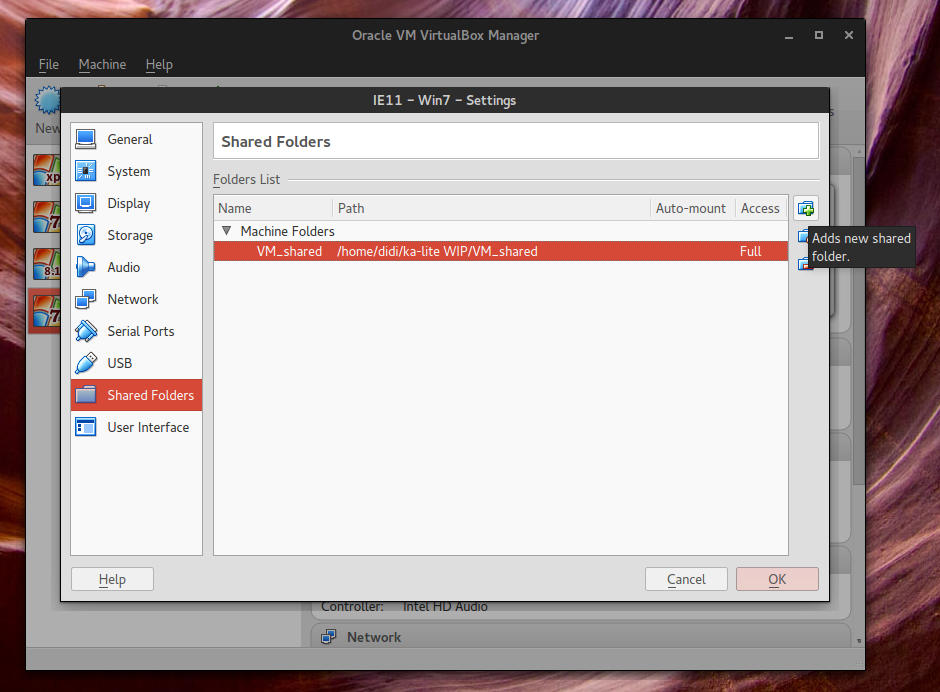
Click on Settings and amplify video memory for VM, and Enable 3D Acceleration.

In the Shared Folders pane add the folder you created previously where you keep Kolibri and other installers on your host machine that you want to make available for virtual machines.
Start the newly imported VM.
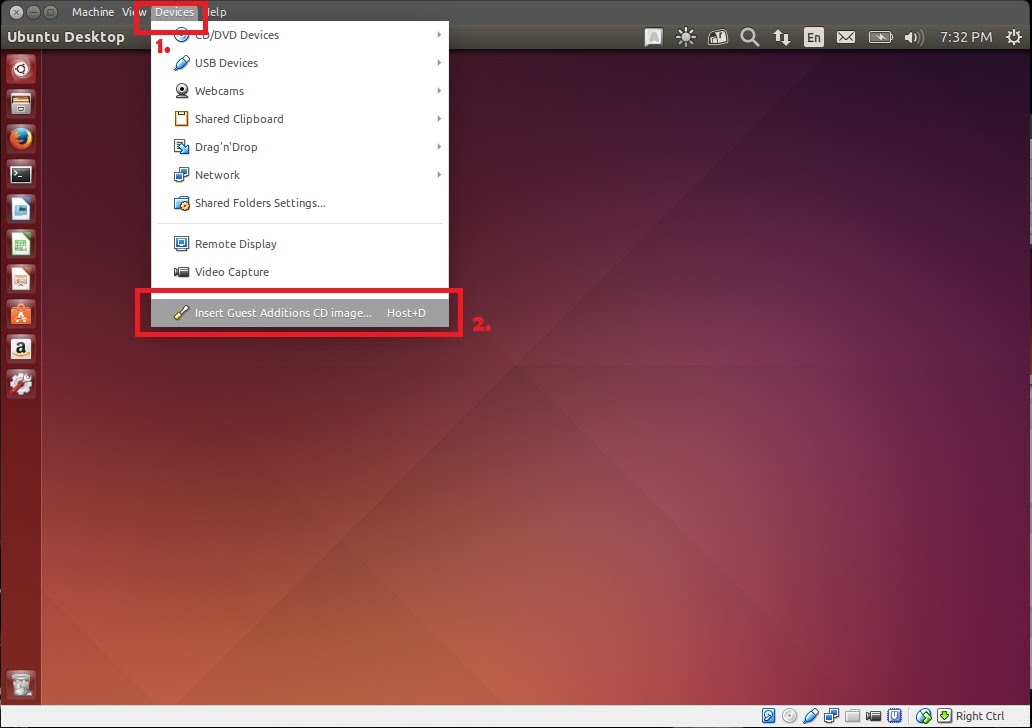
Open Devices menu and select Insert Guest Additions CD image… option.
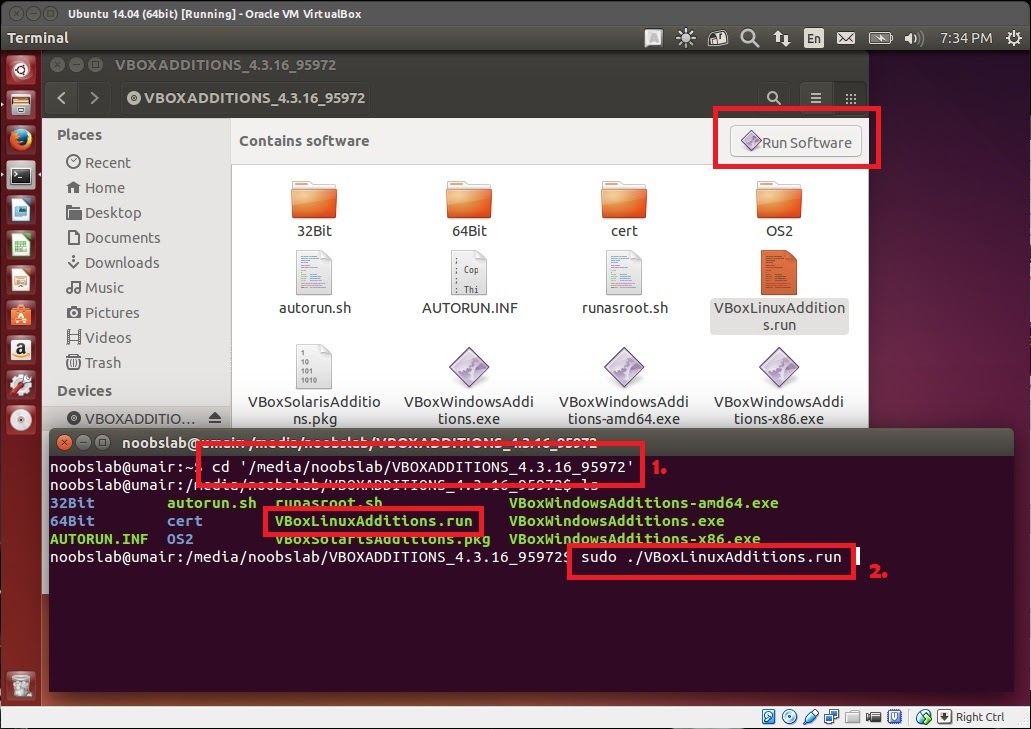
Add your Ubuntu user in vboxsf group to access VirtualBox shared folder in Ubuntu guest. Open Terminal and run:
sudo adduser <username> vboxsf
Reboot and you’ll be able to find and open the folder shared in VirtualBox Settings, under the Network in Ubuntu guest.
Happy testing!