Test Kolibri in Windows guest
Download virtual machine images
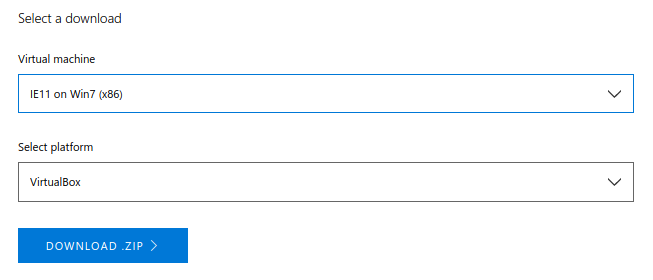
We use Modern IE virtual machine images. Choose the virtual machine (VM) image you wish to test according to your host OS and download them to your computer.
Select Windows version virtual machine
Select VirtualBox platform
Note
We do not support Internet Explorer 10 or below, so make sure to download the VM image with IE11 or above.
Import VM image into VirtualBox
Extract the contents of downloaded .zip file to obtain the corresponding VM image file with .ova extension.
Double-click the .ova file to import the VM into VirtualBox. You can change some options in the Import window, but it’s best if you leave the default values and setup everything in the VirtualBox Settings once VM is already imported.
Configure virtual machines for testing
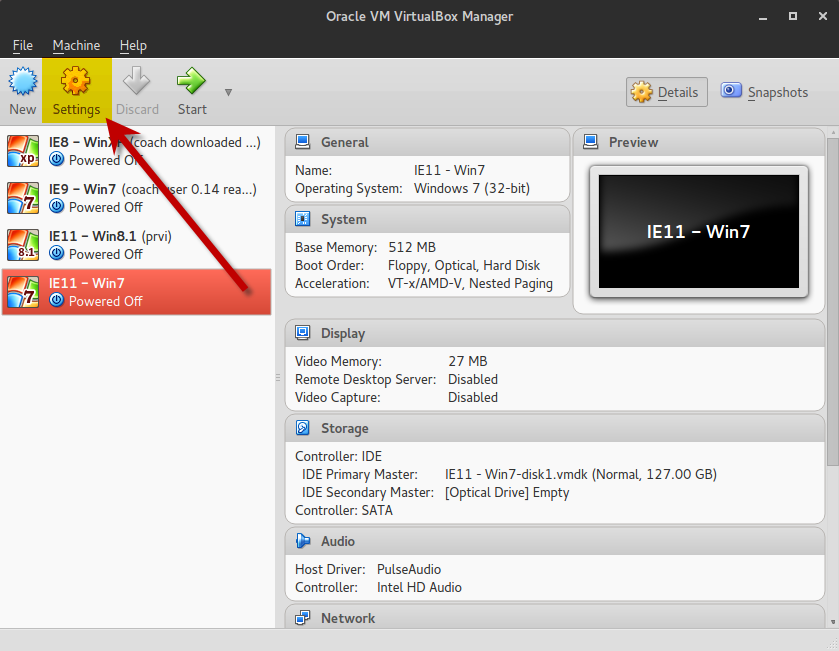
You can have several VMs imported in the VirtualBox Manager Window. Select the VM you want to use for testing and press the Settings button to start the configuration:
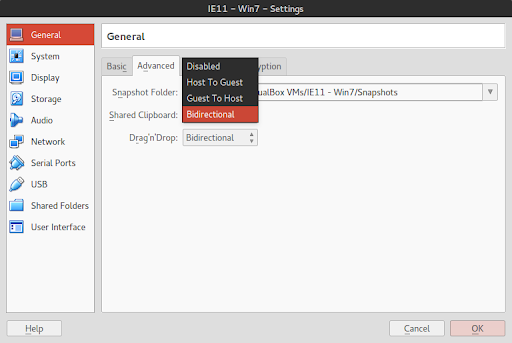
Select the General pane and go to Advanced tab:
In the Shared Clipboard and Drag’n’Drop drop-down menus select *Bidirectional* - this will allow you to use Copy & Paste functions between the VM and your host OS (very useful for copying code and error outputs back and forth! ;)
Select the System pane: In the Motherboard tab allocate as much RAM as your OS can spare to VM’s Base Memory with the slider:
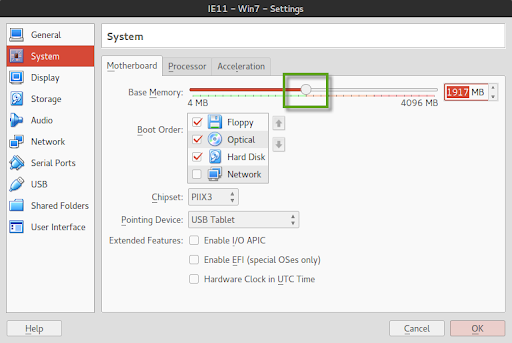
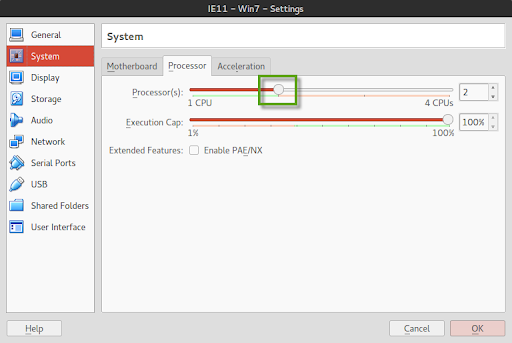
In the Processor tab allocate as many CPU’s as your OS can spare to VM’s Processor(s) with the slider:
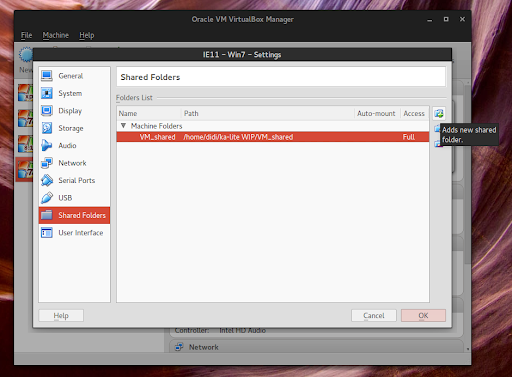
In the Shared Folders pane add the folder you created previously where you keep Kolibri and other installers on your host machine that you want to make available for virtual machines.
Press the OK button to save all the changes and close the *Settings* window.
At this point your virtual machine is ready so you can start it and unleash the tester in you!
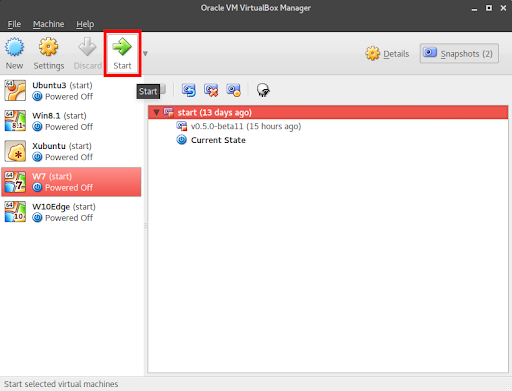
Start Virtual Machine
Press the green arrow button to start the selected VM.
Recommendations for VM tuning prior to Kolibri installation
Manual testing is not a complex process, it usually involves a repetition of predetermined steps in a given testing scenario and recording the results, but it can be time consuming. Unless you are working with VirtualBox on a powerful host computer, VM will run more slowly. The following list of actions to take will help you tune the VM and make it as fast as possible. Apart from allocating as much RAM and processor power as your host OS can spare, you should also perform the following steps:
Disable Windows Update and Modules installer
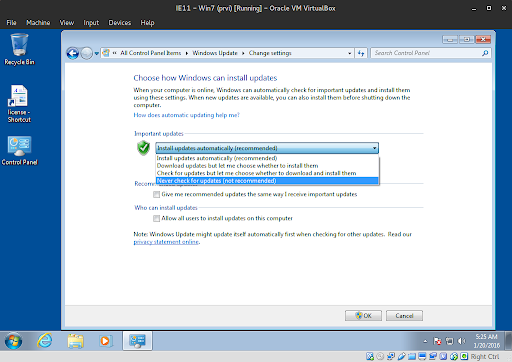
Modern.ie VMs will come with Windows Update enabled and active by default just as any regular OS. Downloading and installing the updates will require time and occupy VM resources, which will slow down your testing process. Since it is unlikely that Kolibri installation will be somehow affected by VM without the latest Microsoft patches, you should disable Windows Update altogether.
Go to Control Panel > Windows Update > Change settings and select Never check for updates from the drop down menu. Press the OK button to save the selection.
Unfortunately, previous step does not seem to be quite enough, so the fastest solution is to stop the two culprit services altogether. Go to Control Panel > Administrative Tools > Services, locate the Windows Update and Windows Modules Installer services on the list and right-click on each to open their Properties window:
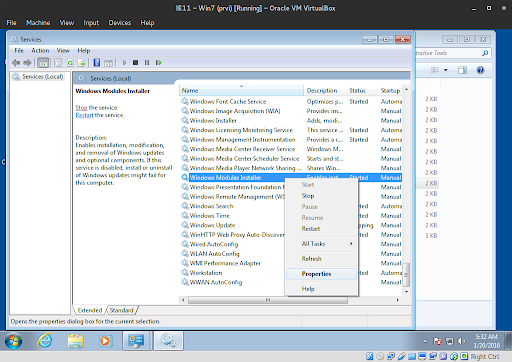
Press the Stop button in the Properties window to stop the service.
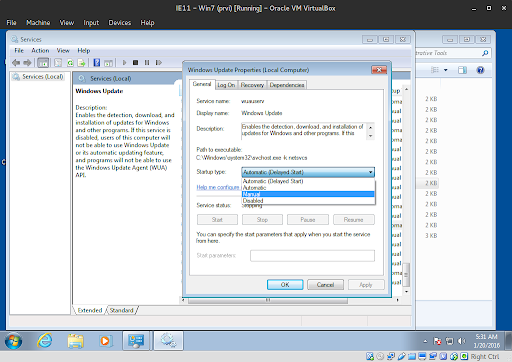
Select Manual from the Startup type drop down menu.
Beware not to select Disabled as it may hinder the installation of Python.
Press buttons Apply and OK.
Restart the VM. This way both Windows Update and Windows Modules Installer services will not hog the resources on your VM anymore and testing will be much faster!
Install additional browsers - Mozilla Firefox & Google Chrome
Tip
Keep downloaded browser installers in the same folder designated as Shared with your VMs
Apart from Internet Explorer that comes by default with Windows, you should test Kolibri on other browsers like Firefox and Chrome.
It is also recommended that you install basic FF addons & Chrome extensions that will help you work faster and collect better information.
Recommended addons/extensions
TODO
Install Kolibri
Tip
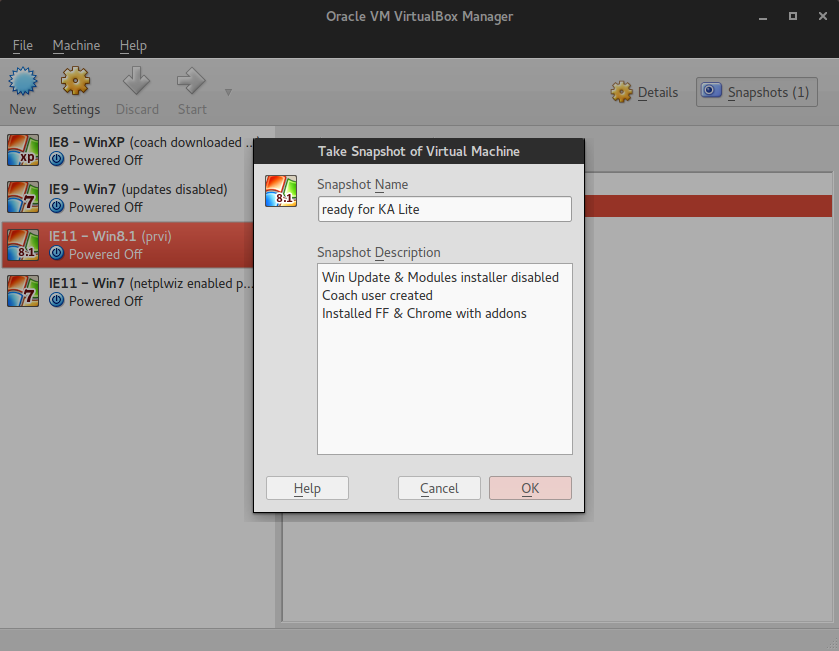
Make a “baseline” snapshot of your VM prior to installing Kolibri the first time
After you’ve tuned and optimized your VM and installed browsers, make one Snapshot before you install Kolibri. This will be your baseline VM snapshot upon which you will install each Kolibri version and restore to it to install the next one.
Download minimal content
Download this small testing channel, or others:
nakav-mafak- Kolibri QA Channel (~250MB)
Use the following command to create Kolibri users for testing.
kolibri manage generateuserdata
command to create Kolibri users for testing.
Login as Coach user and create groups and exams as those are not (yet) available through the previous automatic command.
Happy testing!.
Note
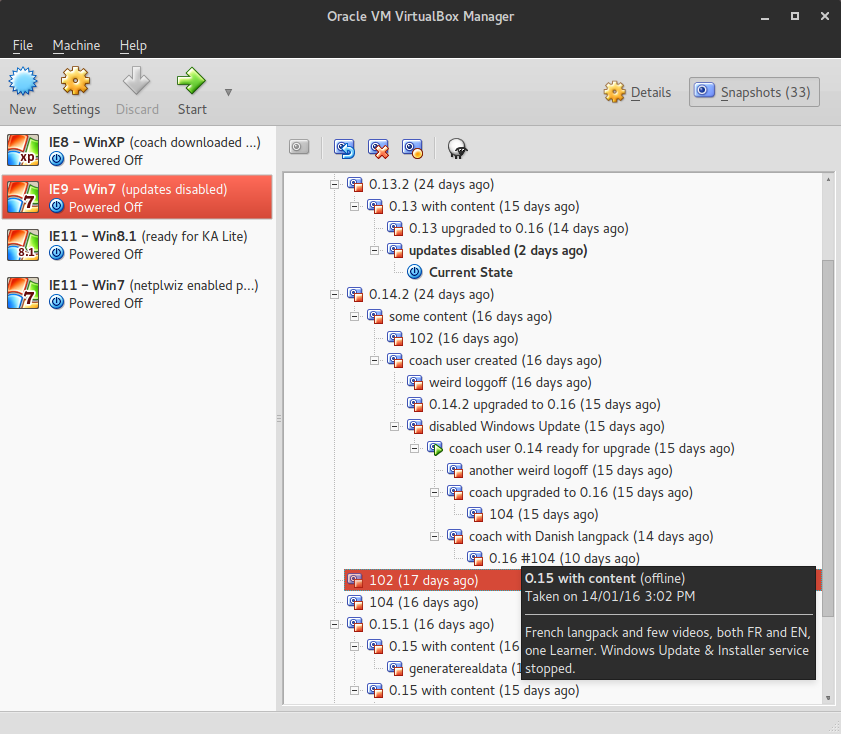
When you finish testing one particular release, save it as a VM Snapshot so you can revert to it if necessary.
The goal is to have baseline snapshots for the initial (system “ready”) state, and new ones for successive test cases. Since we are in early development phase, you will not have a lot of upgrade scenarios that I used to have while testing KA Lite:
Tip
Delete unnecessary snapshots because they can occupy a lot of disc space over time.
Use the recommended format for filing Issues on GitHub.
Use browser debugging tools and screenshots to better illustrate the problem.